UnityのWebGLビルドをレンサバに設置する際やっとく設定のメモ
WebGL の Build and Run
Unity の WebGL プラットフォームの Build の際、 Build and Run をボタンを押せば Unity Editor はローカルサーバーを建てて動作確認することができます。
簡単便利。

サーバーにアップロード
とわいえ「ローカルで動いたから」といって何も考えずにそのままレンタルサーバーにアップロードしても、そのままでは動作してくれない。 (いや、レンタルサーバーによっては動くかもしれんが)
Brotli のエラー
Unable to parse Build/temp.framework.js.br!
If using custom web server, verify that web server is sending .br files with HTTP Response Header "Content-Encoding: br". Brotli compression may not be supported over HTTP connections. Migrate your server to use HTTPS.
Gzip のエラー
Unable to parse Build/temp.framework.js.gz! This can happen if build compression was enabled but web server hosting the content was misconfigured to not serve the file with HTTP Response Header "Content-Encoding: gzip" present. Check browser Console and Devtools Network tab to debug.
なるほど、webサーバーの設定がうまくできてないのだな、と .htaccess で gzip や brotli をなんやかんやしよう・・て試行錯誤したがなんやらうまくいかない。と踠いていたらもっとシンプルに対処できる方法を見つけた・・というより公式に書いてた・・。(わかりづらいけど)
WebGL: Compressed builds and server configuration - Unity マニュアル
サーバーで動作させるために設定すること
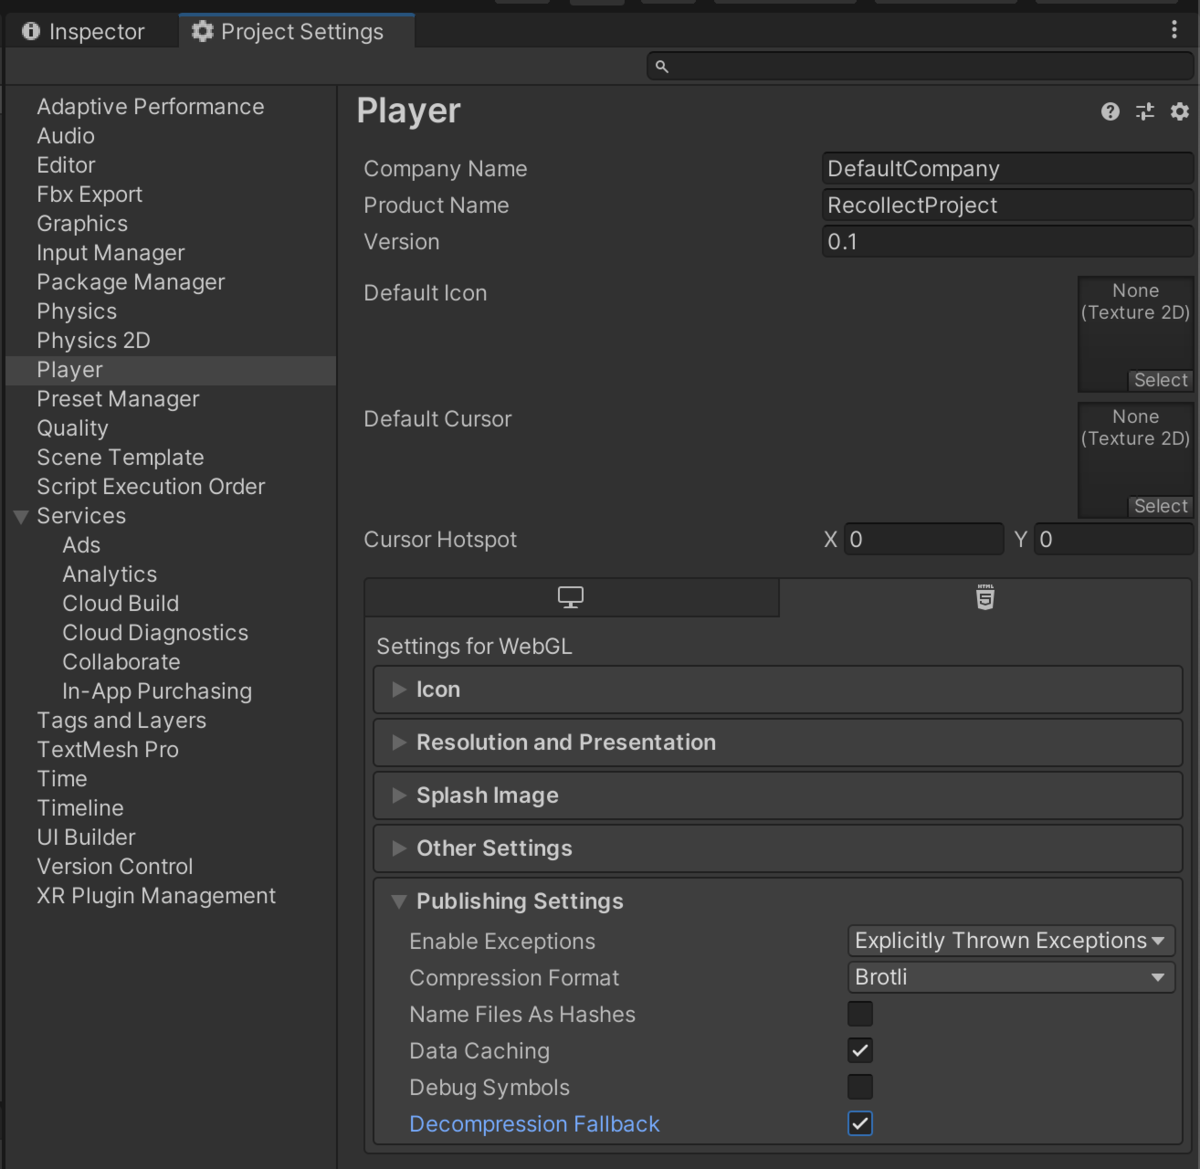
1. Decompression Fallback にチェックを入れて Build
(ここではBrotliの例を記載する。チェックを入れると br ファイルではなく unityweb という独自の拡張子で書き出し、 loader.js でよしなにしてくれるらしい)

2. 下記記述の .htaccess を Build ディレクトリ直下に配置
<IfModule mod_mime.c>
  AddEncoding br .unityweb
</IfModule>
3. サーバーにアクセスしたら見れる!
やったー。 これで安易にゲームを公開できるようになったぞ。